

Your website, in your hands.
Editing your Mainfolk site is easier than it looks. There is no code, nothing to install, and you cannot break it. This guide walks you through it one step at a time, with pictures.
The left panel changes things. The right panel shows them.
That one idea is the whole editor. On the left you make changes. On the right you see exactly what a visitor will see. The right side is a live preview: you never type on it directly.
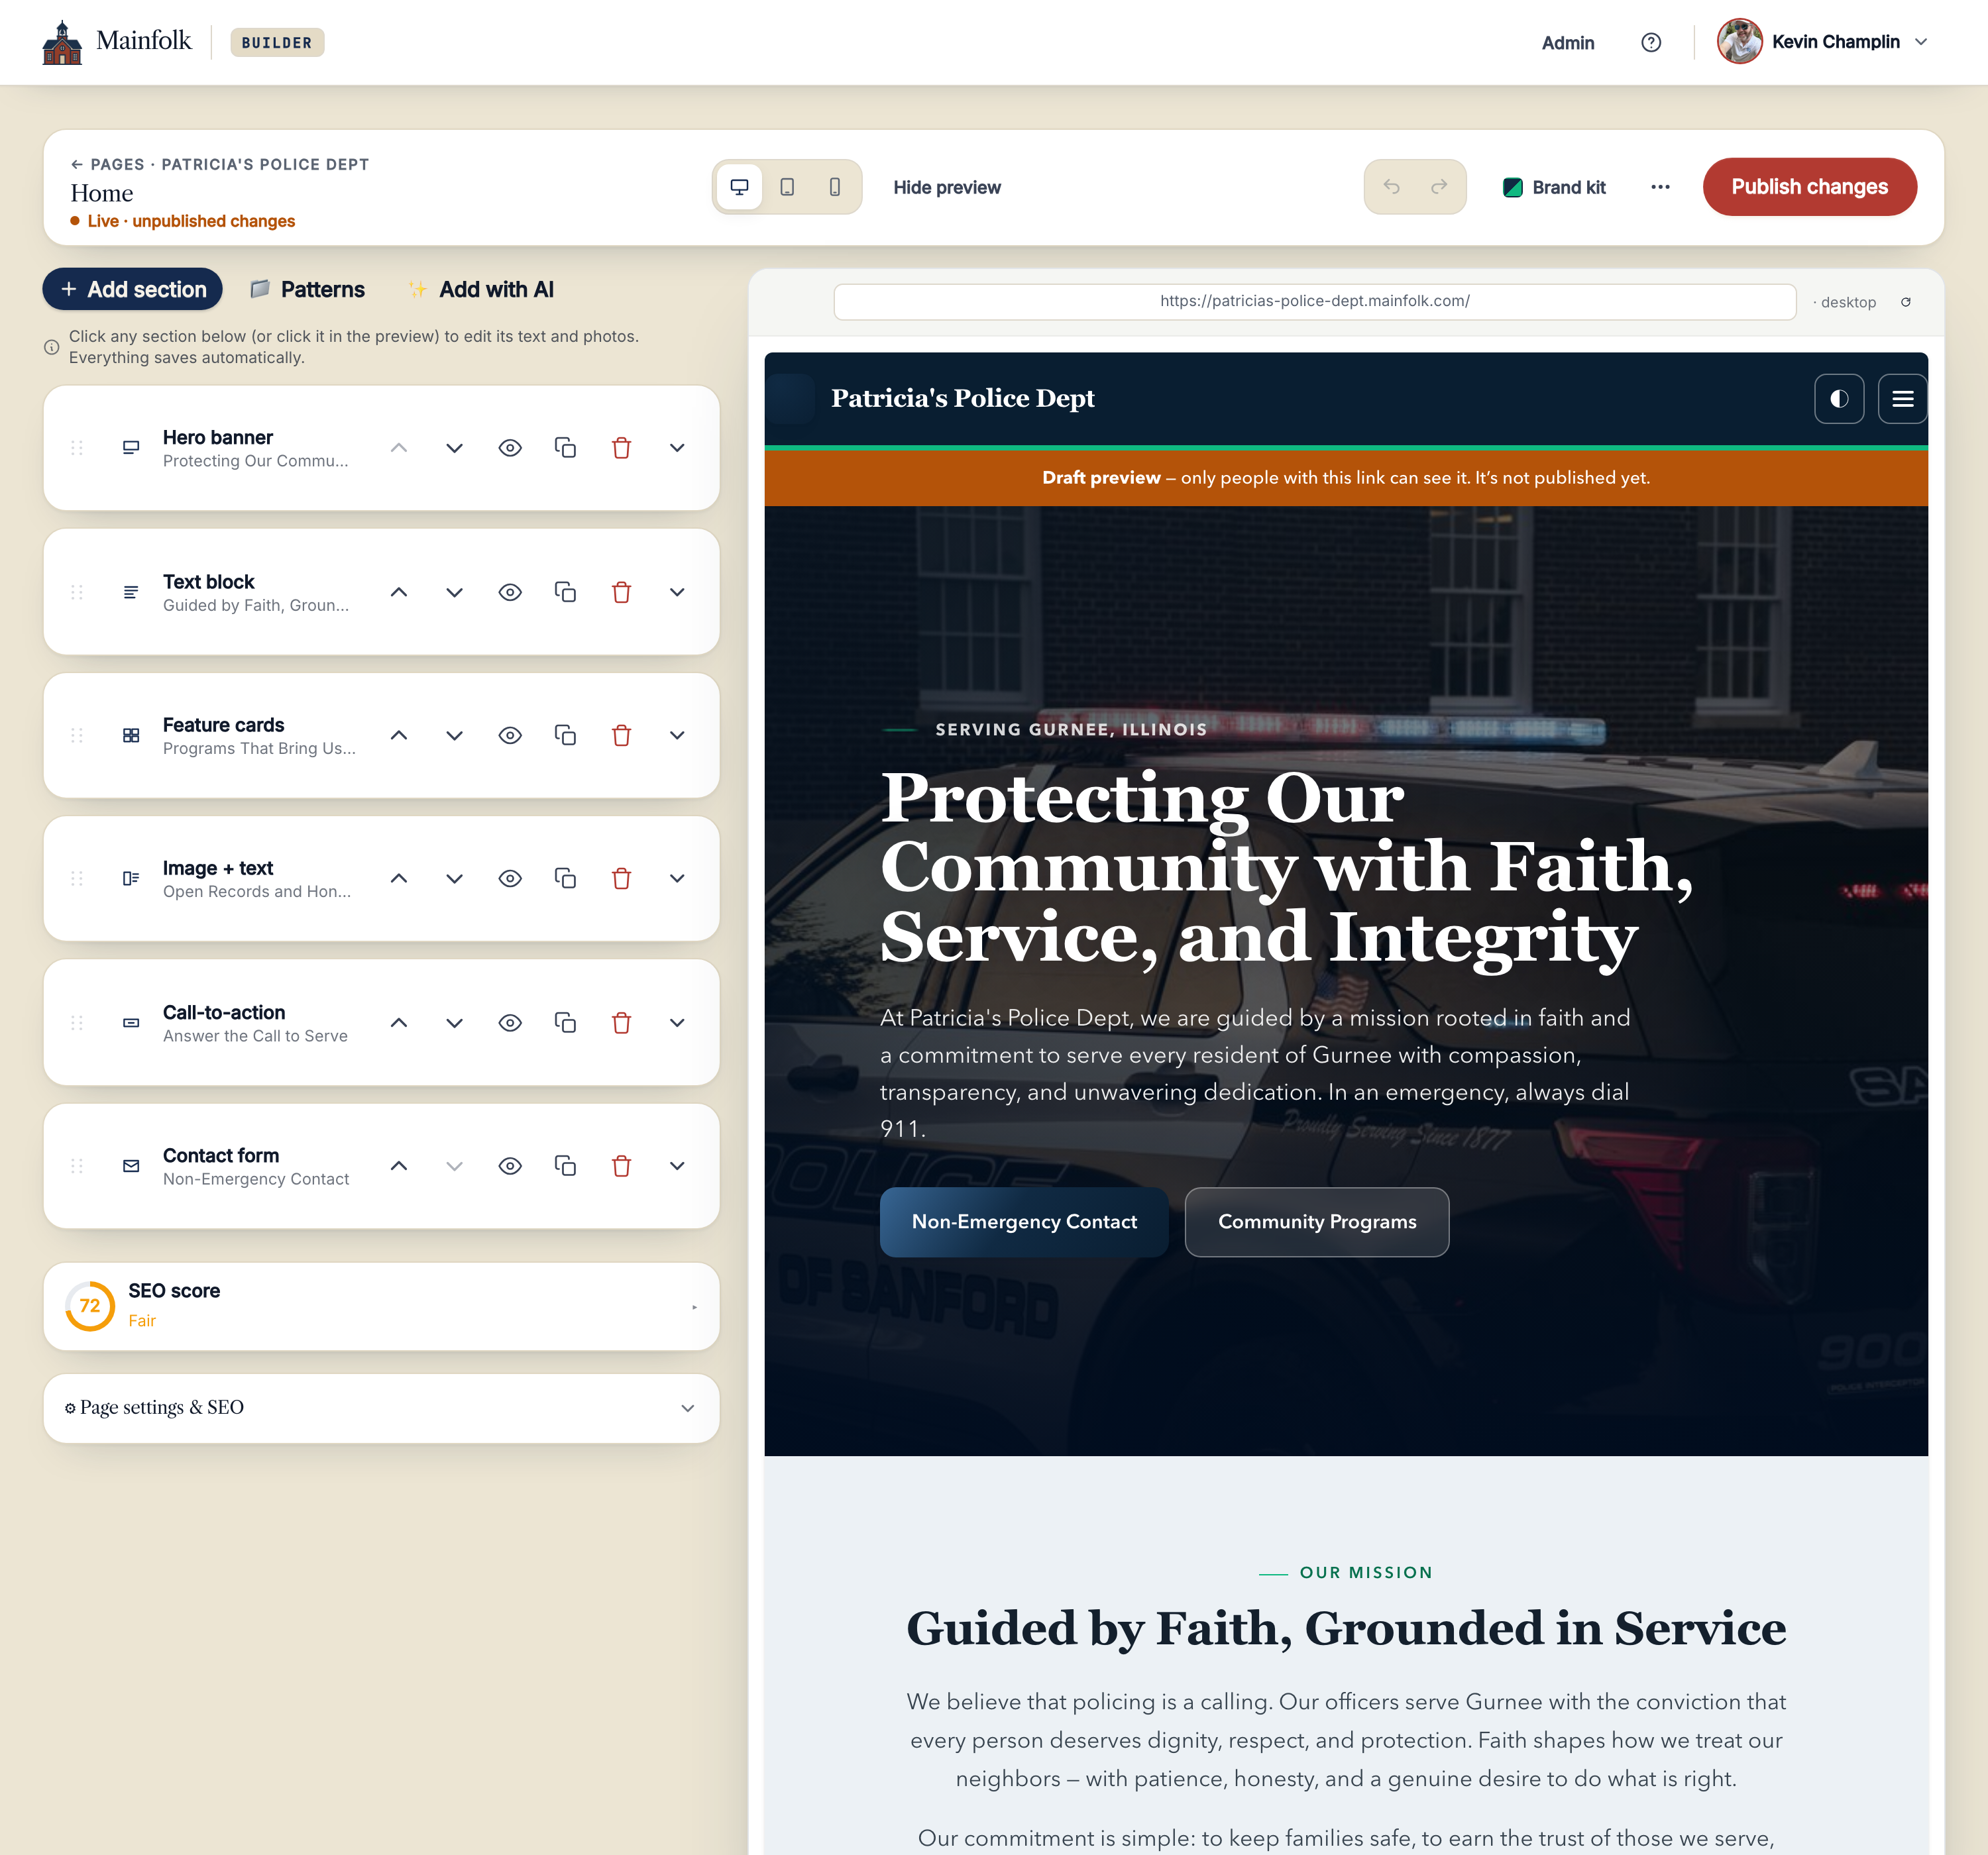
There are two ways to open something for editing, and they do the same thing:
- Click it in the list on the left.Each row is one part of your page. Click a row to open its settings.
- Or click it in the preview on the right.Click any headline, photo, or button in the preview and its controls open on the left, ready to edit.
How to open the editor
Start from your dashboard, pick the page you want to work on, and you are in.
- Log in at mainfolk.com/login.Use the email you signed up with. We send a magic link, so there is no password to remember.
- Open your site from the dashboard.If you run more than one site, choose the one you want.
- Choose a page under Pages (for example, Home).The editor opens with that page's controls on the left and the preview on the right.
What the buttons across the top do
The bar along the top of the editor holds the controls you use most often.

Your page is a stack of sections
A section is one band of your page: a hero banner, a block of text, a row of cards, a contact form. The list on the left shows them top to bottom, in the same order they appear on your site.
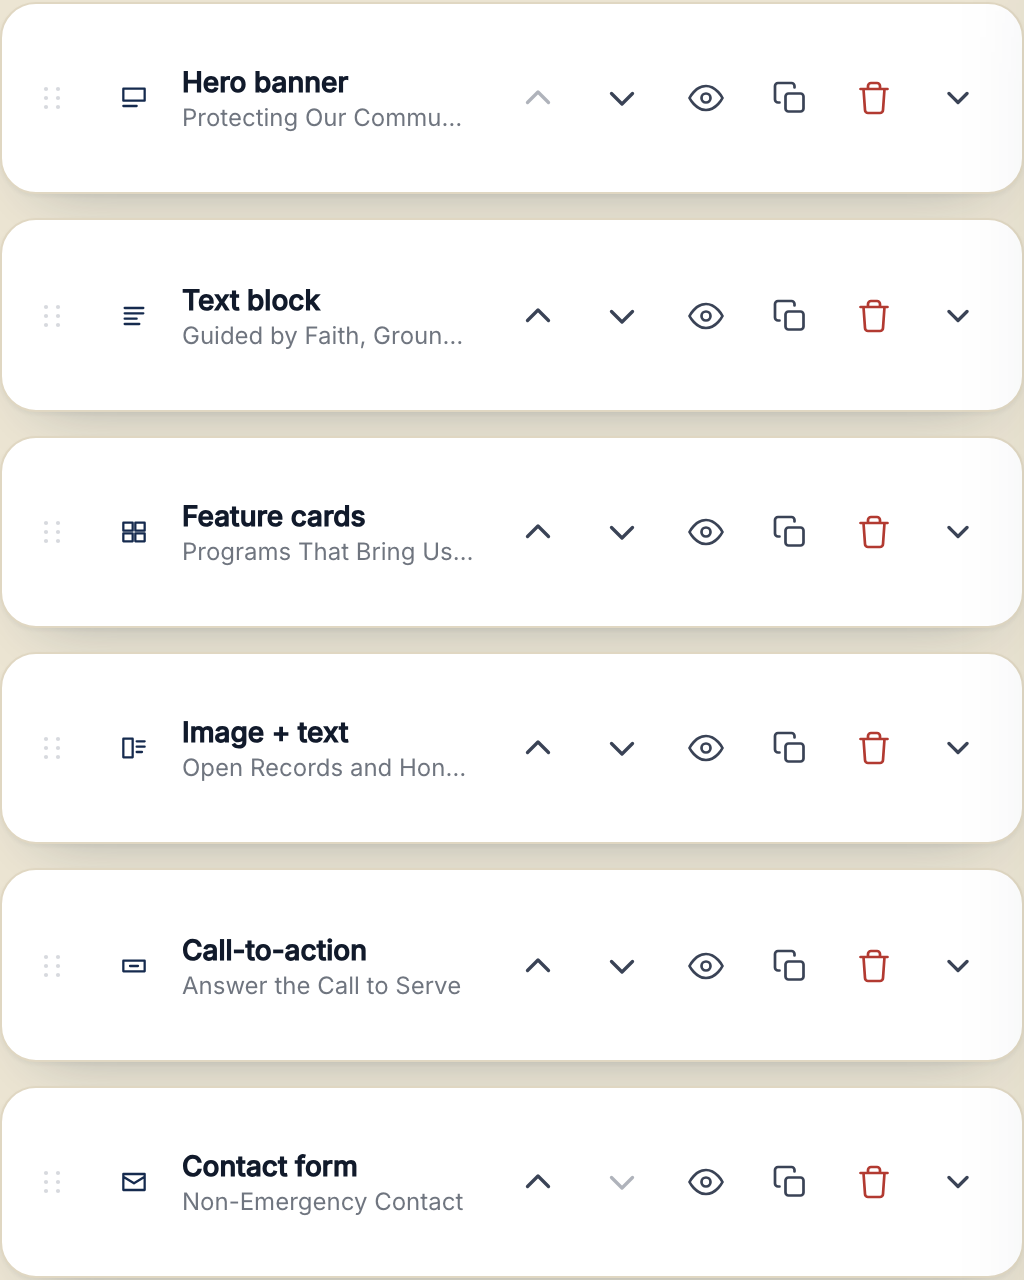
The small icons on each row let you manage that section without opening it. Here is what each one does:
Change any words on your page
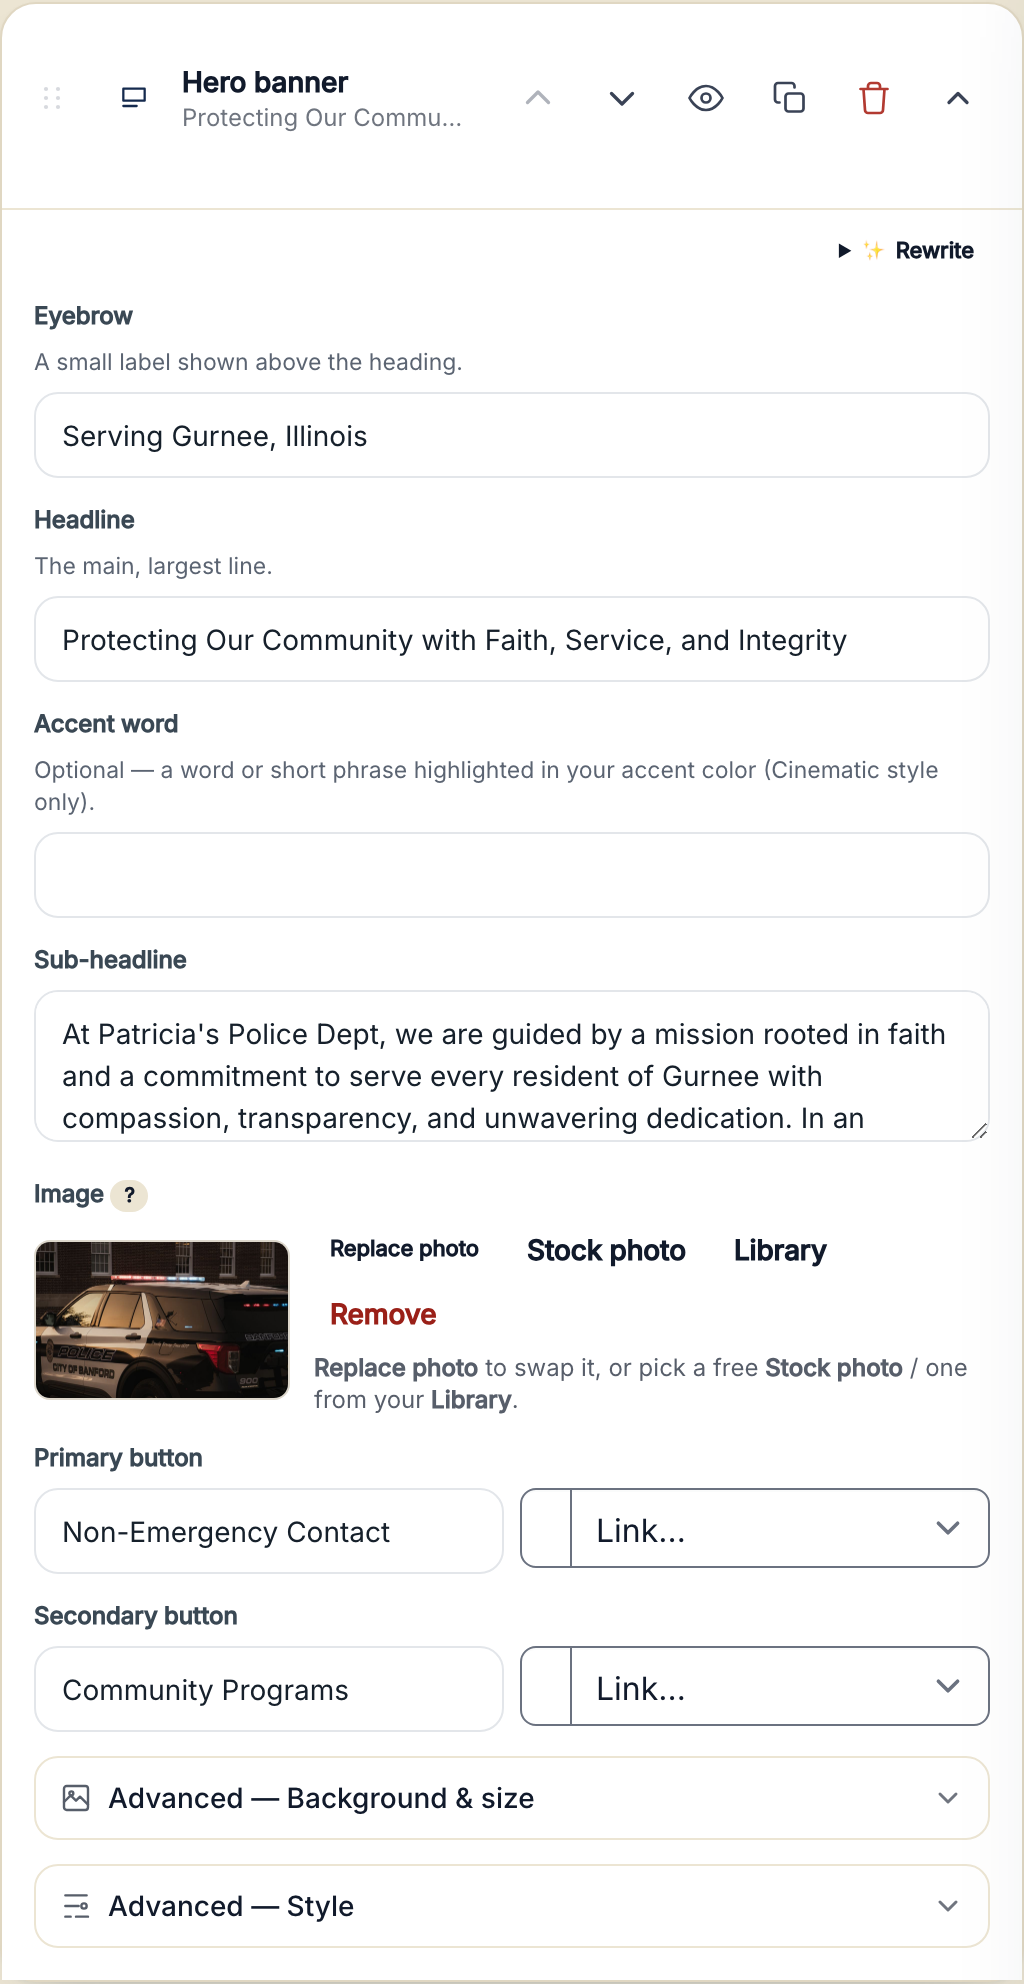
Open a section and its fields appear on the left. Type in a field and the preview updates as you go.
- Click the section you want to change.It opens to show its fields, like Eyebrow, Headline, and Sub-headline.
- Click into a field and type.Each field has a small grey hint under its name telling you what it is for.
- Watch the preview update.Your new words appear on the right. There is no Save button, it saves as you type.
Replace a picture with your own
This is the one people ask about most, so here it is in detail. Every photo on your page has the same four controls.
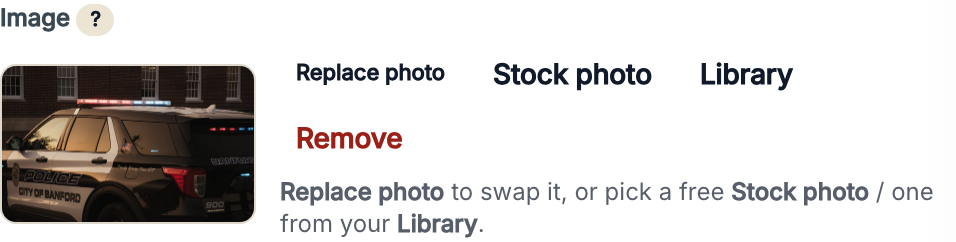
- Open the section that has the photo, and find the Image control.You will see a small preview of the current photo and four buttons beside it.
- Replace photo puts your own picture in.Choose a photo from your computer or phone. JPG, PNG, or WEBP files work best.
- Stock photo searches thousands of free professional photos.Type what you want (for example "candles" or "main street"), then click one to use it.
- Library reuses a photo you have already added.Everything you have uploaded lives here, so you never have to upload the same picture twice.
- Remove takes the photo back out.The spot falls back to its default. Add a new one any time.
Add something new to the page
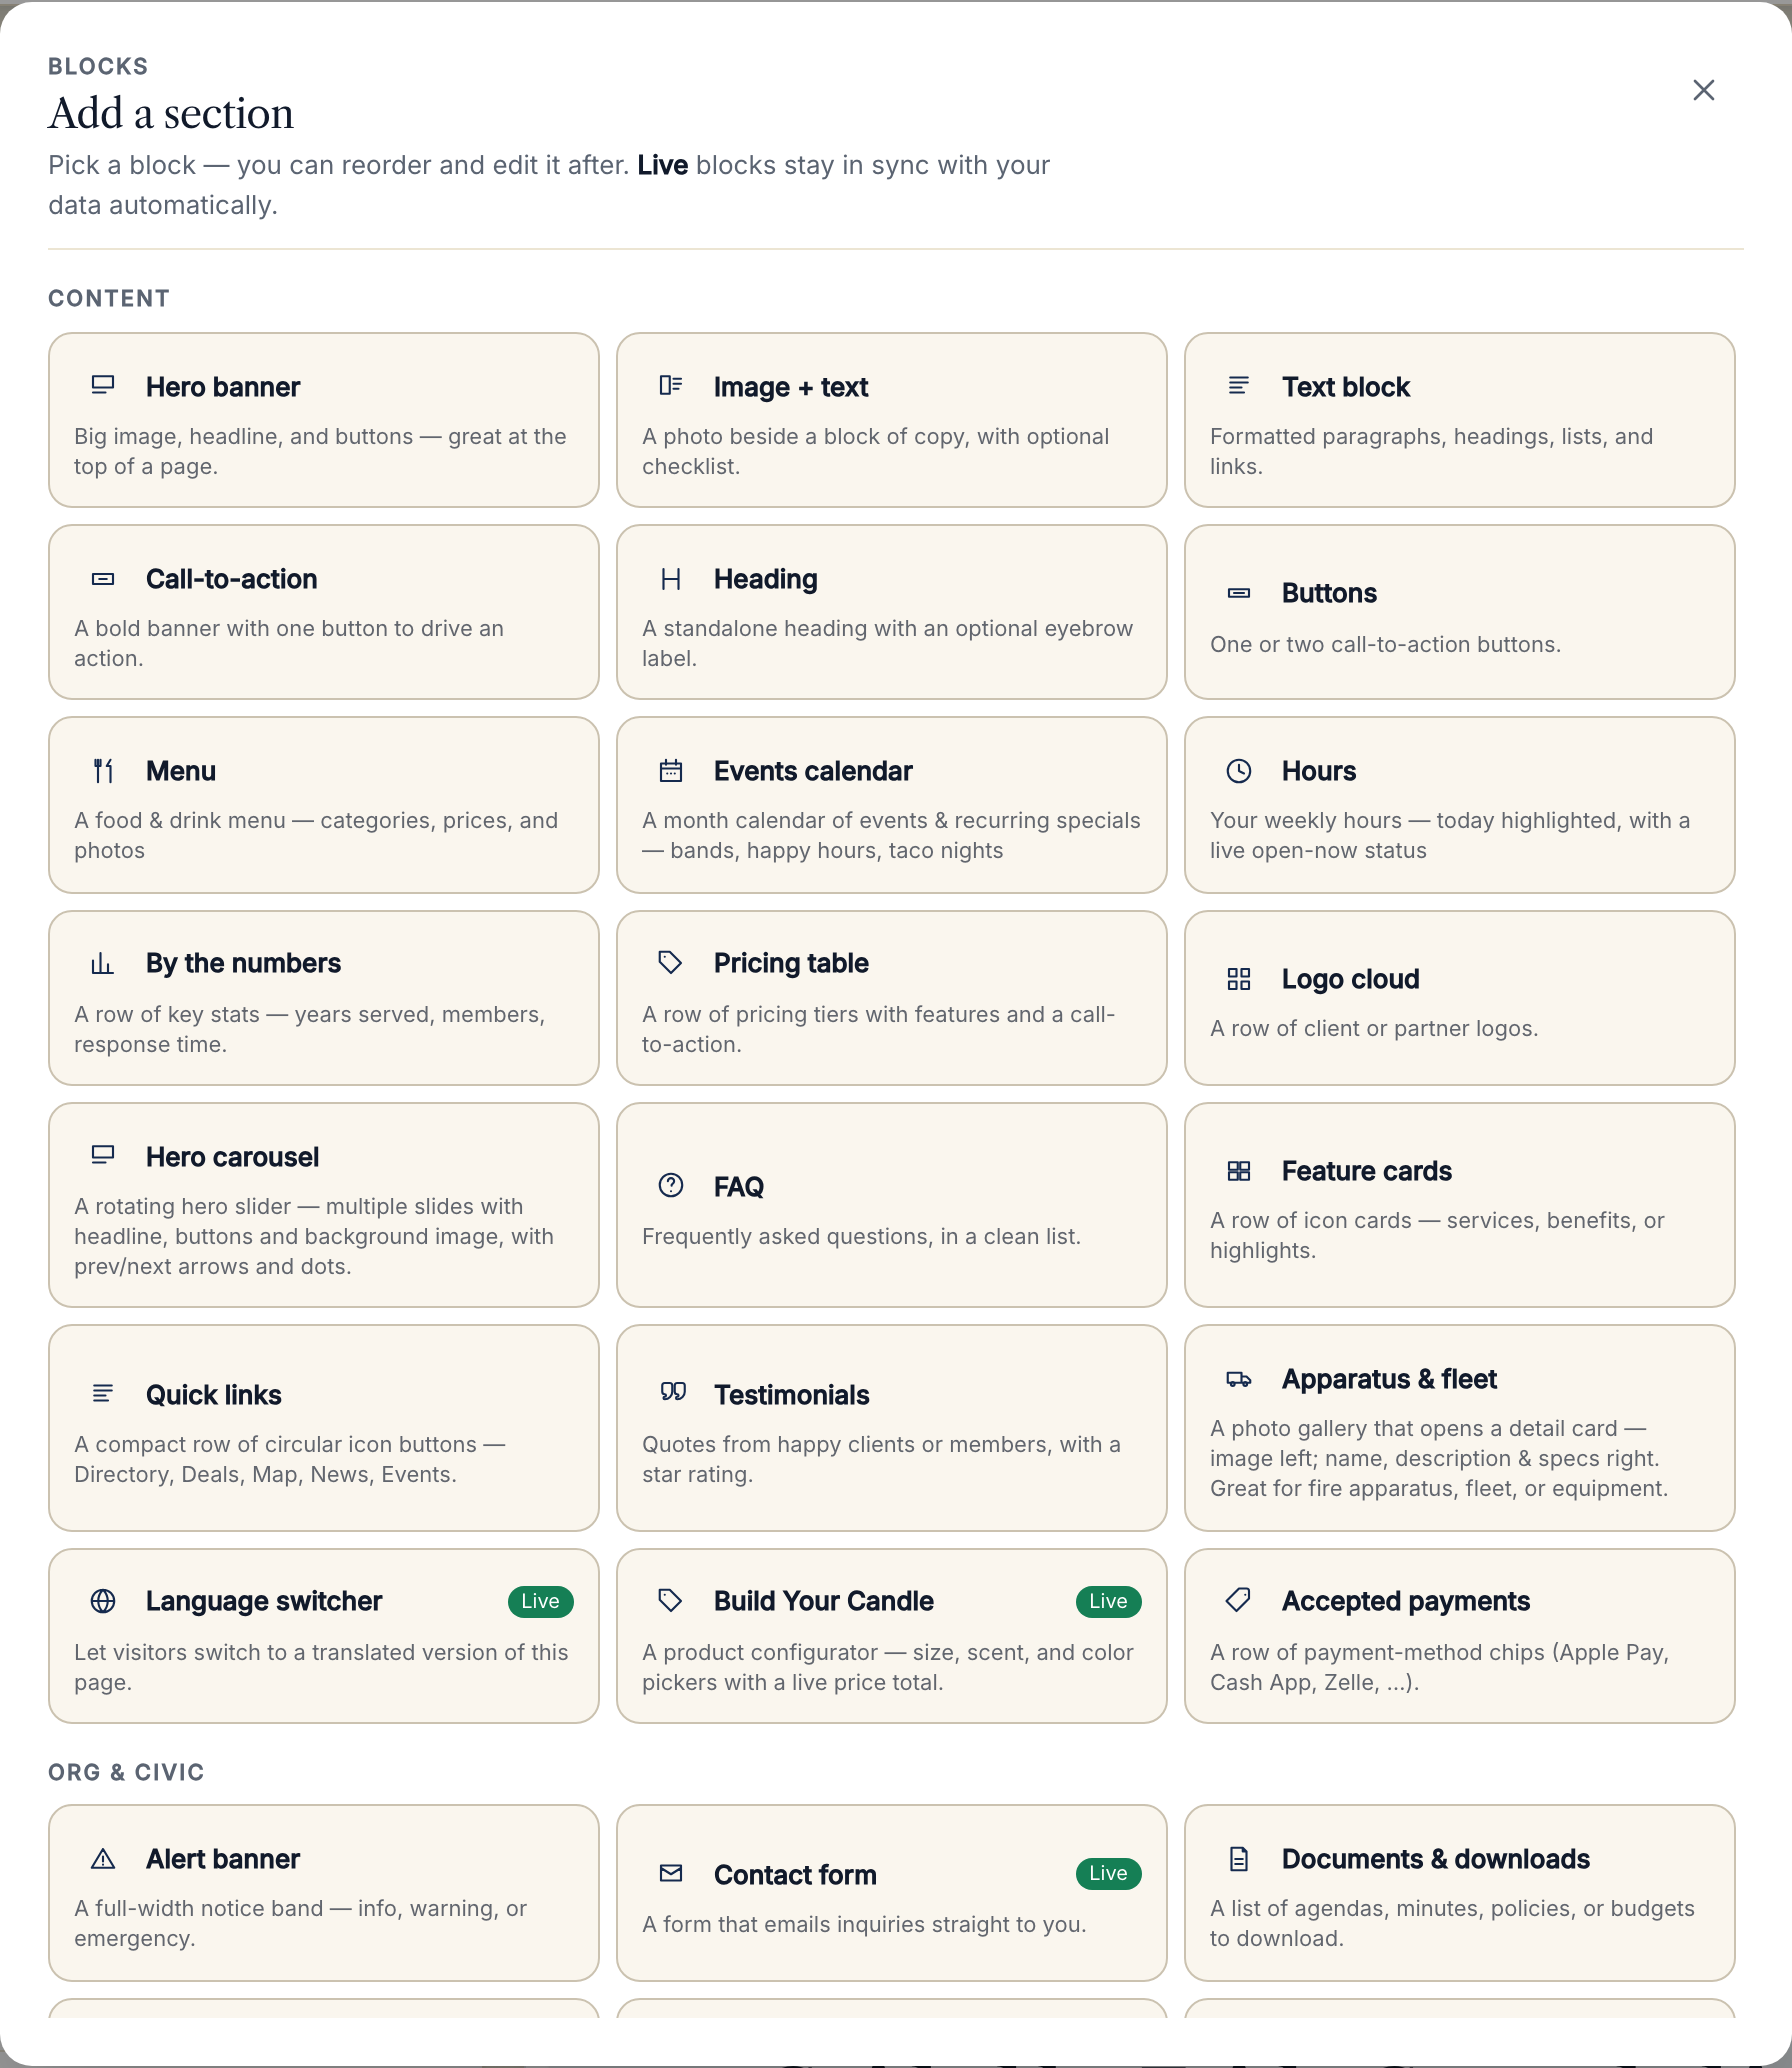
Need a new band on your page, like a row of photos, a set of hours, or a contact form? Add a section.
- Click + Add section at the top of the section list.A gallery of building blocks opens, each with a short description of what it is.
- Pick the block you want.It is added to the bottom of your page, ready to edit and move.
- Edit it and drag it into place like any other section.
Reorder, hide, duplicate, or delete
You are never stuck with a layout. Use the row icons from step 4, or drag.
- Reorder: drag a section by its handle (the six dots), or use the up and down arrows.
- Hide: click the eye to take a section off the live site without deleting it. Great for something seasonal.
- Duplicate: click the copy icon to clone a section as a starting point.
- Delete: click the trash icon. It asks first, and Undo brings it back.
Make your changes go live
Your edits are saved as a private draft as you work. The public does not see them until you publish.
- Review your page in the preview, and check it on phone with the device buttons.
- Click the red Publish changes button, top right.Your updates go live within a few seconds.
- That's it. The status returns to a calm "Live" with no pending changes.
More than one page
Most sites have a few pages: Home, About, Contact, and so on. Everything above works the same on every page.
- Click ← Pages at the top left to see all your pages.
- Open any page to edit it, or add a new one.You can rename a page and choose which one is your home page.
- Your menu (the links across the top of your site) is set in the Header & Footer area, so visitors can find every page.
A few things people ask
Can I break my website?
No. Your changes are a private draft until you press Publish, Undo reverses anything, and hiding or deleting a section is reversible. Experiment freely.
I made a change but the website looks the same.
Two things to check. First, the preview on the right shows your draft, but the public site only updates after you press Publish changes. Second, if you were already looking at your live site in another tab, refresh it after publishing.
Where do my uploaded photos go?
Every photo you upload is saved to your Library, so you can reuse it anywhere without uploading it again. Find it under the Library button on any photo control, or the Media area of your site.
Do I have to save?
No. There is no Save button because there is nothing to forget. Every edit is saved automatically the instant you make it.
How do I change my logo or colors?
Use the Brand kit button in the top bar. Set your logo, colors, and fonts once and they apply across your whole site.
I am still stuck. Can a person help?
Absolutely. Open the Help & support menu in the editor and choose Contact support, or email us from the contact page. We are happy to help.
Ready to give it a try?
The best way to learn the editor is to open it and change one thing. You cannot break it, and you can always Undo.